Okay, today I want to share and record my last weekend story, like the title, Install OpenWrt on Raspberry Pi (Firmware: OpenWrt/LEDE 17.0.4) as the entry point router in front of my current home wifi router. As we know there are a lot of similar articles on the web, but most of them are unclear, I follow the procedure but failed, so I write it up again :)
Follow me to see the whole story and check it out how to setup a router step by step. (To see the actual setup steps, start from section ##Preparation)
Sunshine is great, and life is peace until …… my router suddenly refused me to ssh into it… lol
Motivation
The story began at last Wednesday afternoon, I received a notification email from Synology, it reported my NAS lost the connection. I thought it may due to random ISP outage, but when I got home that evening, all the things became weird, I could only access internet partially, and from the router page, all the settings seems to be reset to a stage very long time ago, and I even cannot ssh to it .. oh my !! .. !!!
Re-flash the router will entirely clear the inter hard drive, and I have to spend a lot of efforts to back them up. So last weekend, I realized I need a powerful/stable and flexible router instead of it, and for the firmware, I prefer OpenWrt , it’s open source, secure and flexible. Ok, here are the goals of my new router:
- OpenWrt compatible (Support latest LEDE 17.0.4)
- Low budget cost
- As stable as possible
- Easy to setup
- Only few steps
- Limited down time during setup
- Easy to troubleshot if needed
- Easy to restore if needed
- Low risk when setup completely failed
Evaluation
Took those goals, I random searched from web to see which router matches it:
- Netgear WNRD3700: EOL
- Netgear R7900: Poor CPU
- Netgear R8000: Better CPU but the wifi not fully supported by openWrt
- Linksys AC1200: Still $70+ even without strong wifi
- Linksys AC1900: Expensive and has wifi issue
- Linksys AC3200: Expensive and has wifi issue
Seems all these are not good enough, I found that in the home wifi system, two routers would be better than one:
- A light-weight flexible main router for internet (OpenWrt firmware)
- A powerful router for home wifi
Since for the wifi part, the powerful router may install the special/customized hardware and requires the close source driver, so OpenWrt usually could not support it very well or some unstable issues. That means let it run on the original firmware and deliver the best wifi performance should be a good choice. Then, my Raspberry Pi 1B came to me, I totally forgot this little guy for a long time, it almost matched all the requirements, the only problem was that it only had one Ethernet port, but router needs two at least. Well, we need to buy a usb-ethernet adapter to get the job done.
I went to Fry’s directly, since I really need it at that day, didn’t want to wait for the delivery.

Preparation
Everything is all set, from here, let’s go directly – set it up, and make it works. Stuff list:
- Raspberry Pi 1B (Pi 3B would be great)
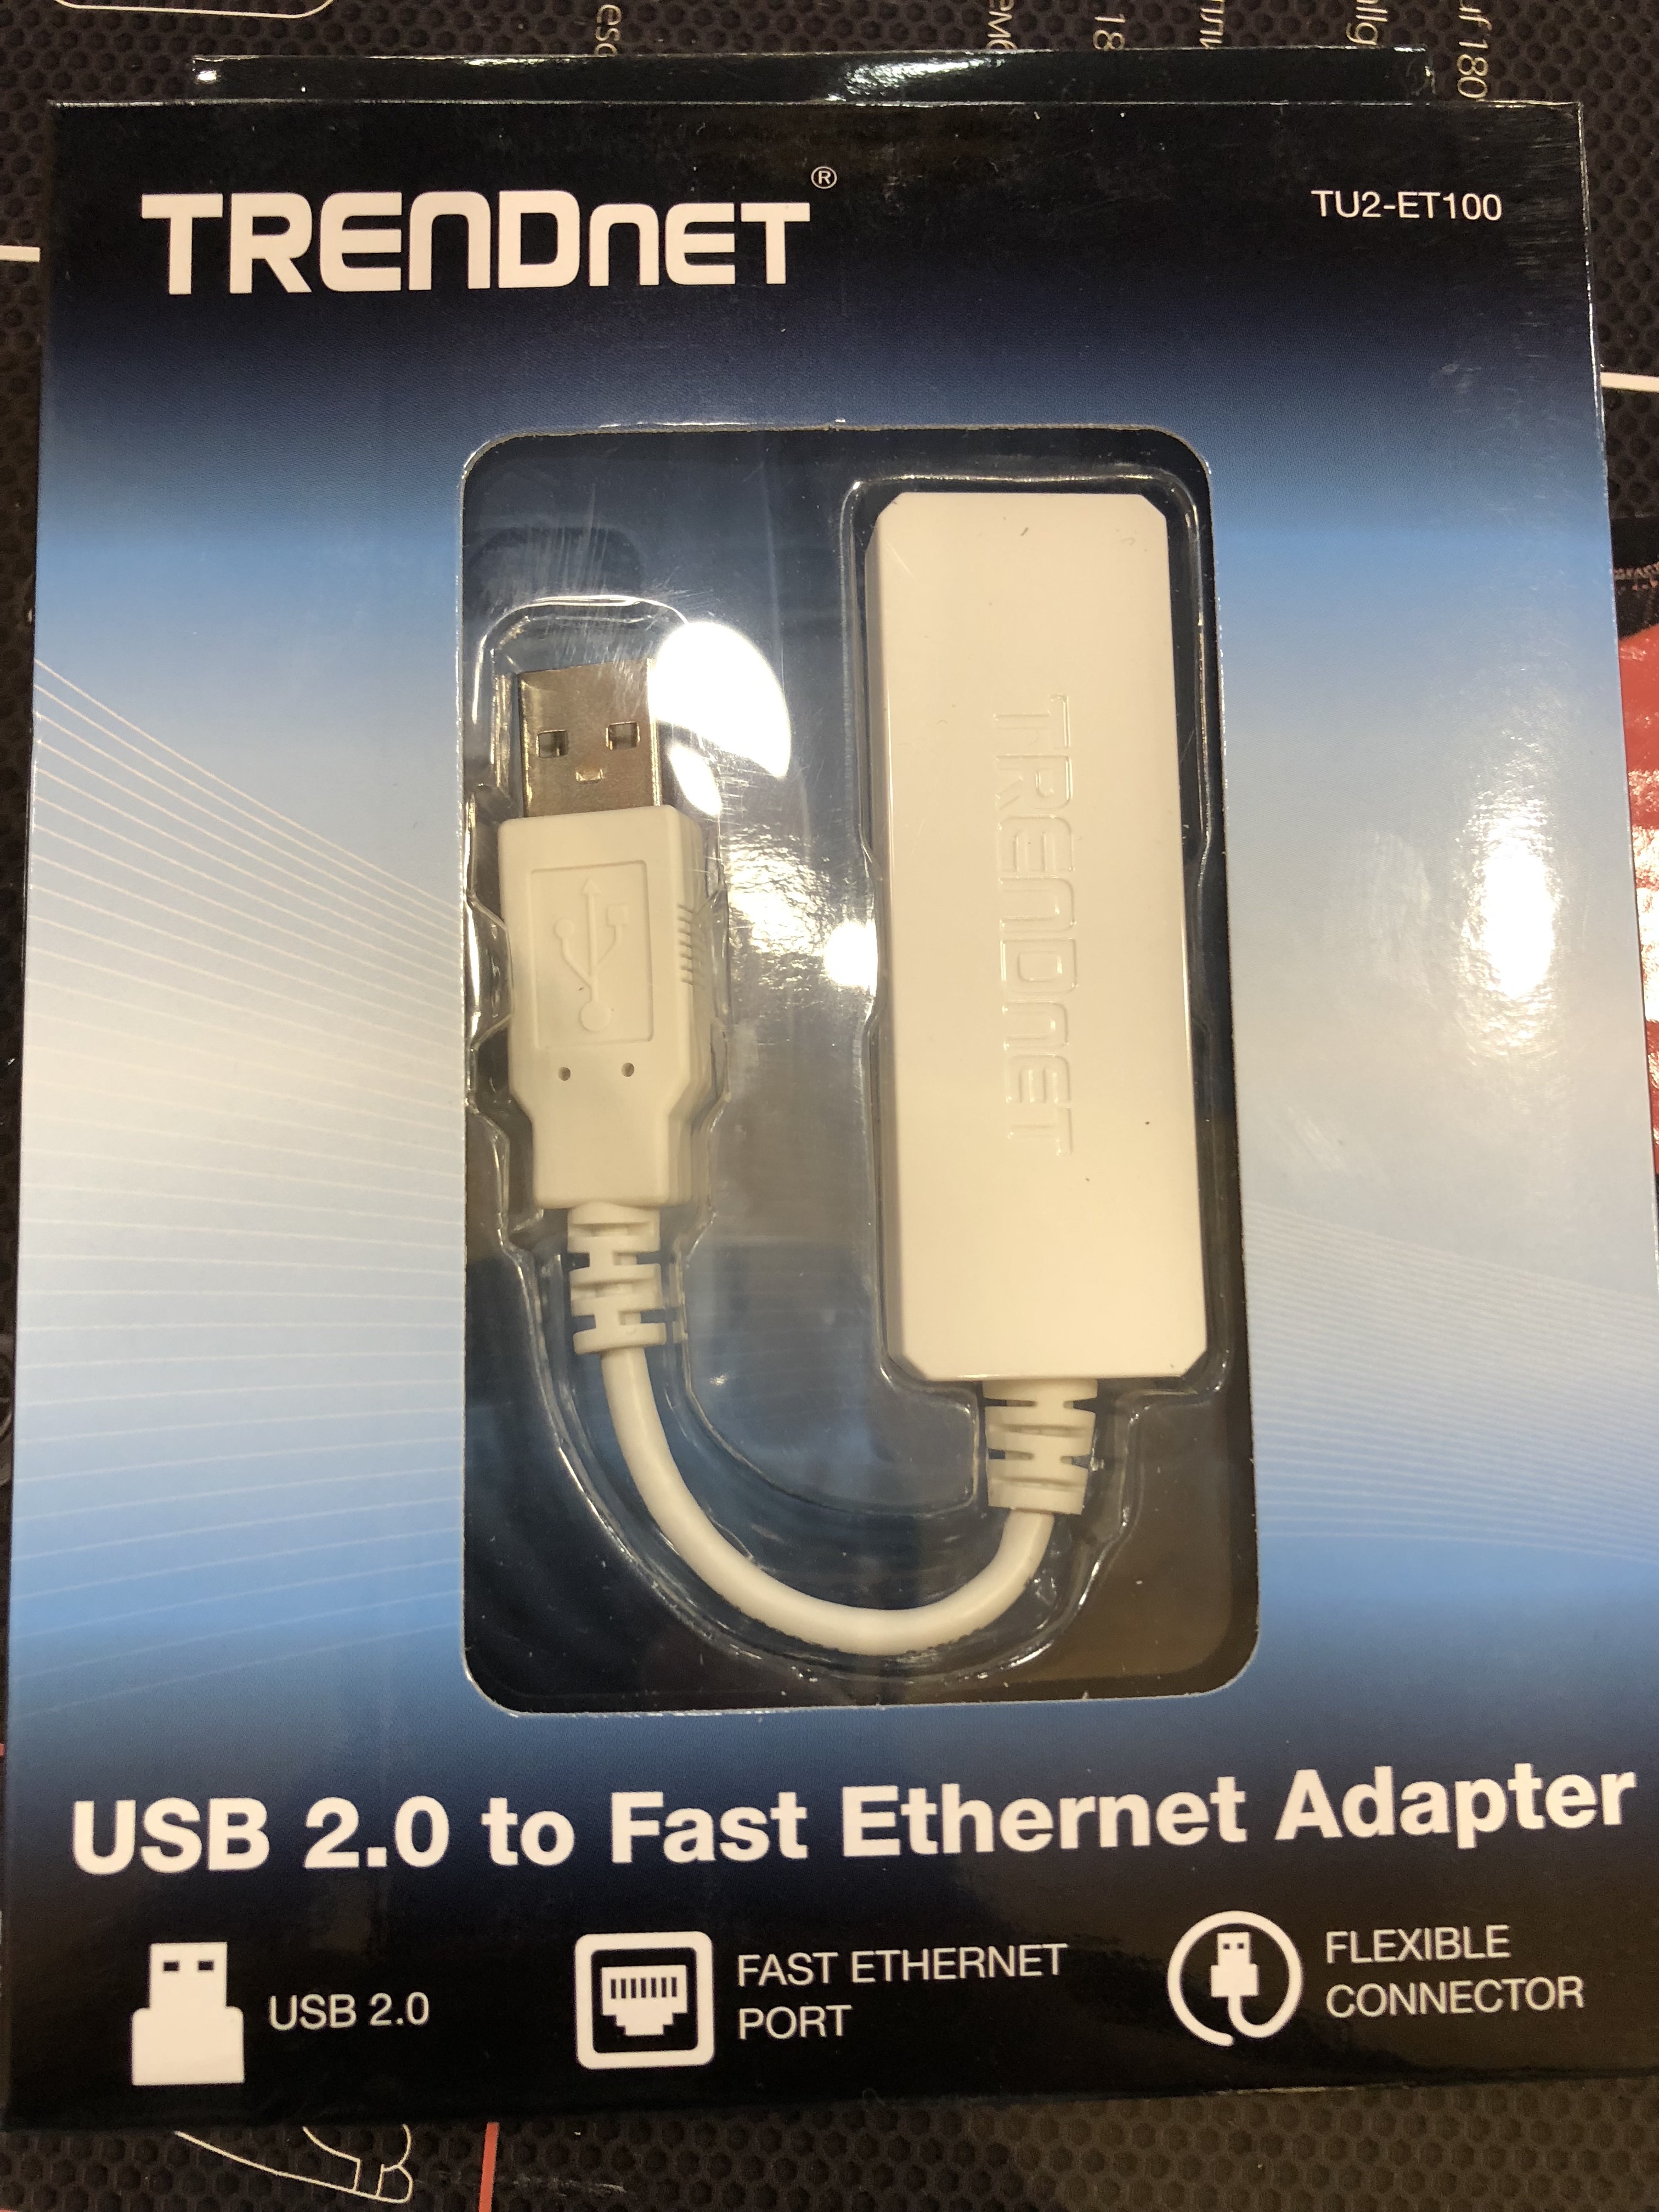
- Usb to Ethernet Adapter
- Trendnet TU2-ET100 (usb 2.0)
- Ethernet Cable x2
- Latest OpenWrt image for RPi 1B model
- SD card and Reader
- Desktop/Laptop
Notes: There is a Pi compatible usb-ethernet adapter list, suggest to buy one from the list, otherwise, it may not works well with Pi/OpenWrt. I brought TrendNet TU2-ET100, a usb 2.0 adapter. And the setup/test plan is:
- Set it up behind current router first
- Test it make sure everything is good
- Pi onboard ethernet port for in-home traffic (plug to current wifi router finally)
- Pi usb-ethernet adapter port for internet inbound traffic (plug to Modem)
- Then take over the internet traffic with limited down time
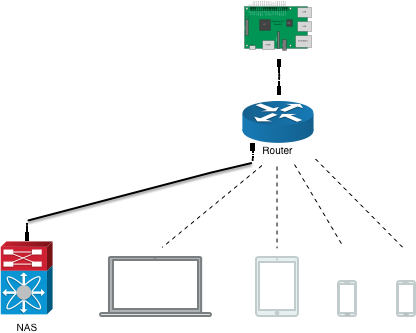
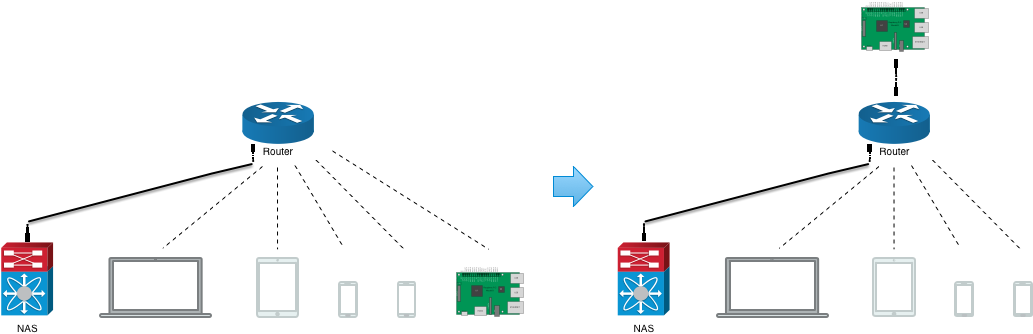
Let’s see the topology before and after first:
Installation
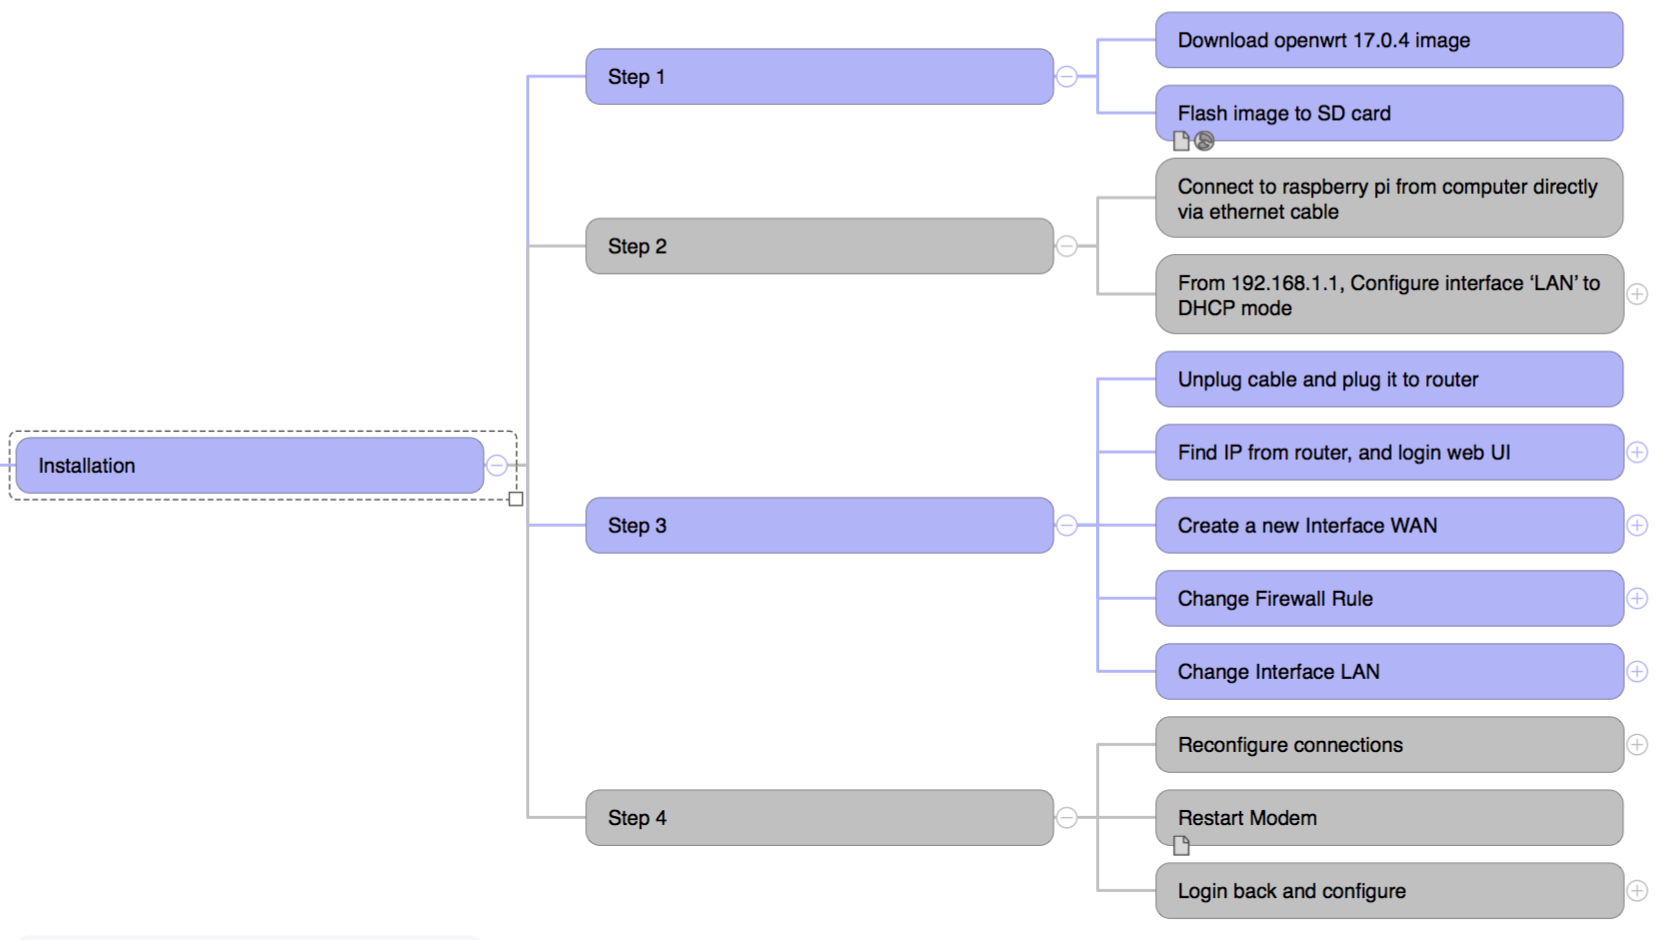
I group all the small steps into 4 major steps. Btw, I use MacOS as the desktop OS.
Step 1 – Flash OpenWrt 17.0.4 to SD card
- Download openwrt 17.0.4 image
- Flash image to SD card
- Insert SD card (SD card reader may needed) into desktop/laptop
diskutil unmountdisk /dev/disk2sudo dd if=~/Downloads/lede-17.01.4-brcm2708-bcm2708-rpi-ext4-sdcard.img of=/dev/disk2 bs=2048diskutil eject /dev/disk2
Notes: To determine the right dev node, we can run mount to check the result.
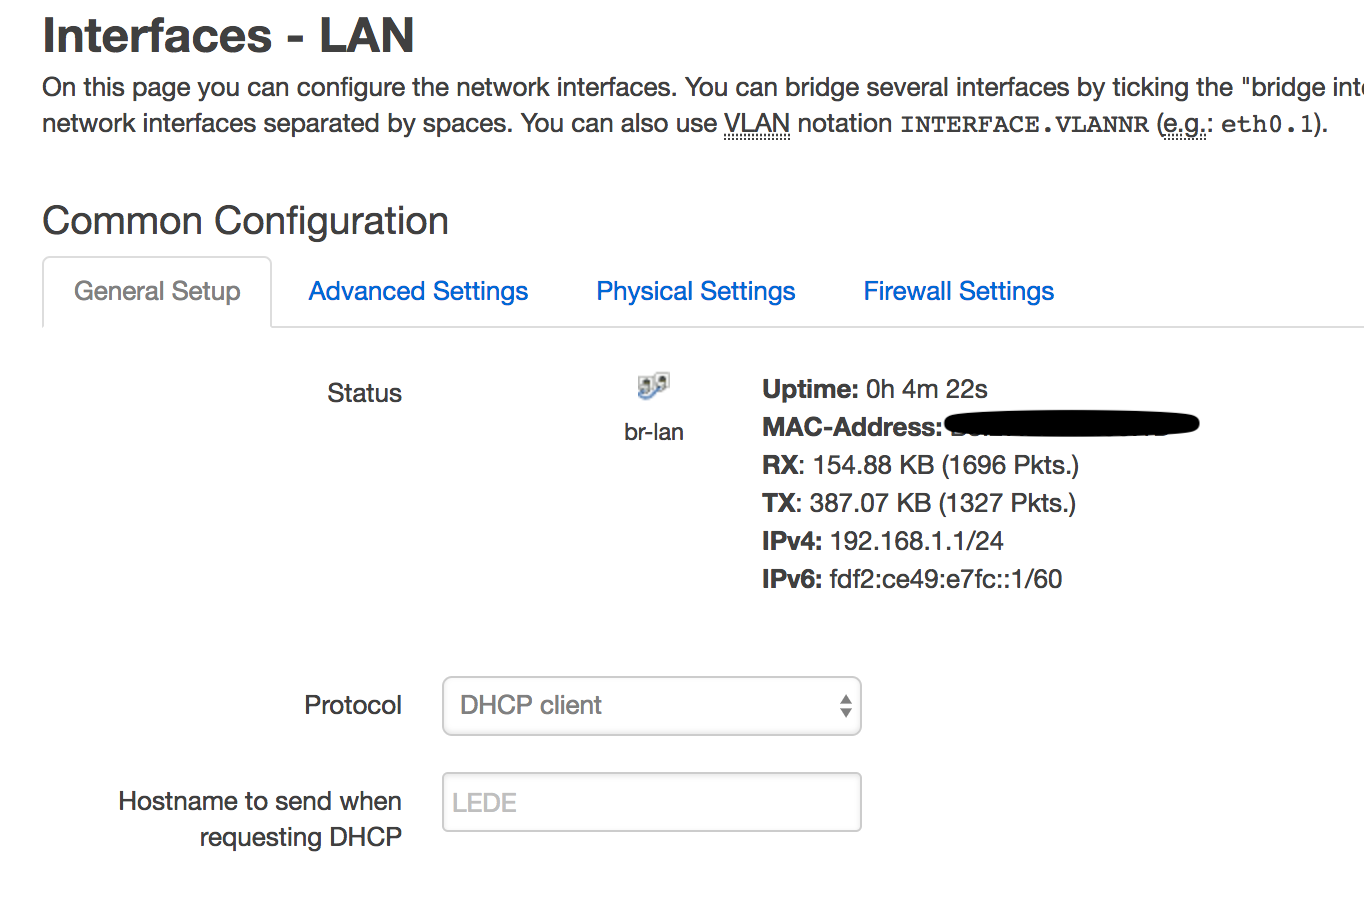
Step 2 – Modify LAN Interface Mode
- Connect to raspberry pi from desktop/laptop directly via ethernet cable
- From browser, open openwrt web UI @
http://192.168.1.1 - Configure Interface ‘LAN’ to DHCP mode
- Change root password
- Enable ssh on LAN interface
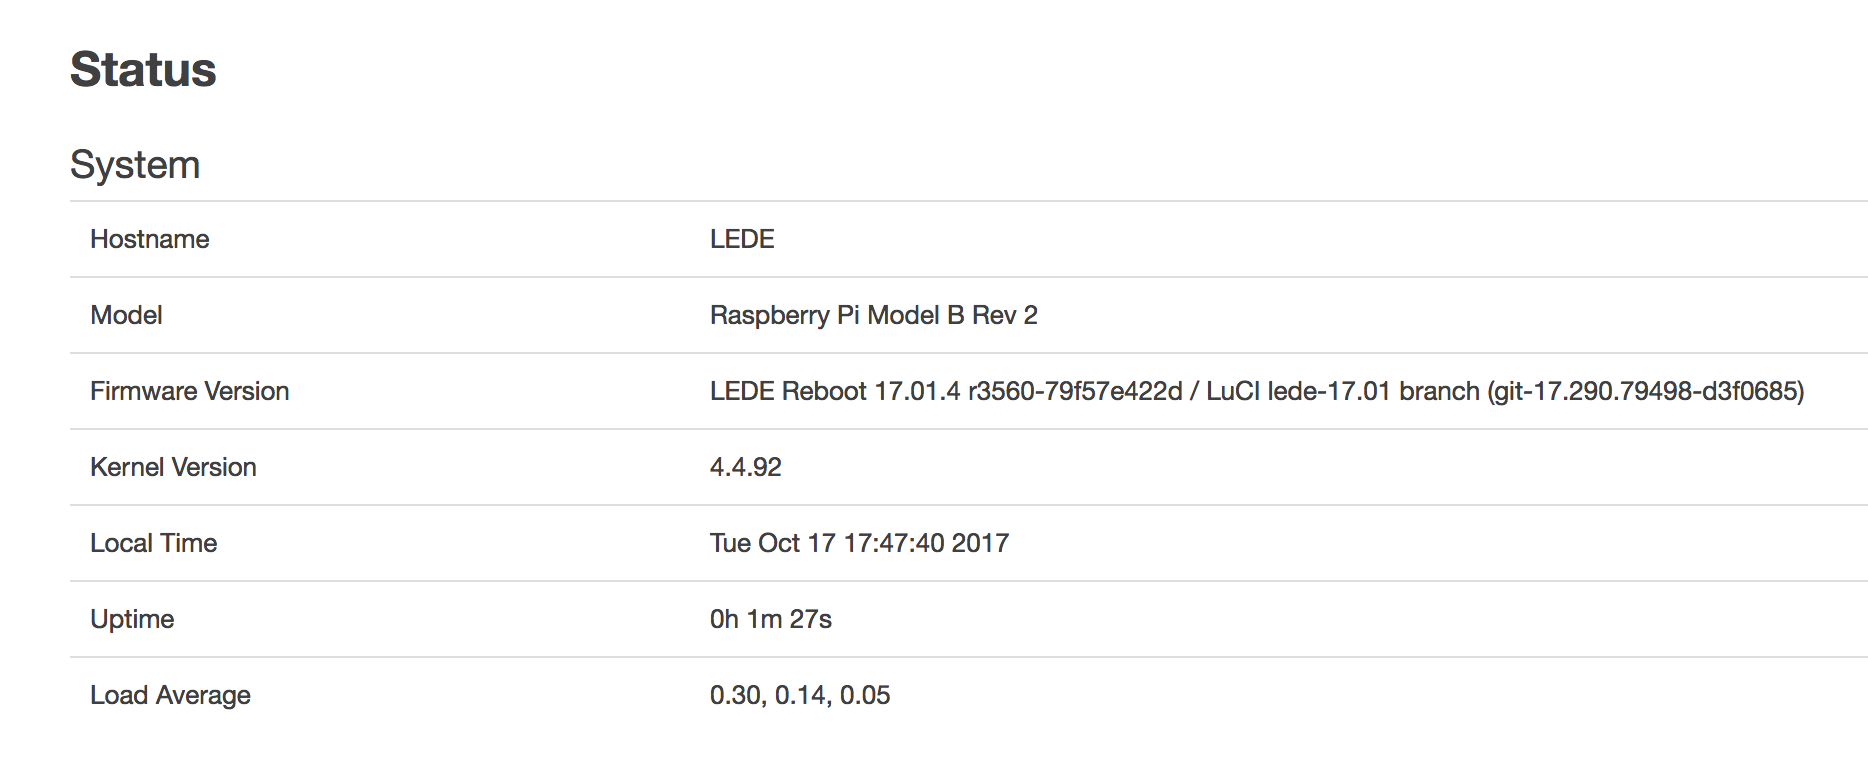
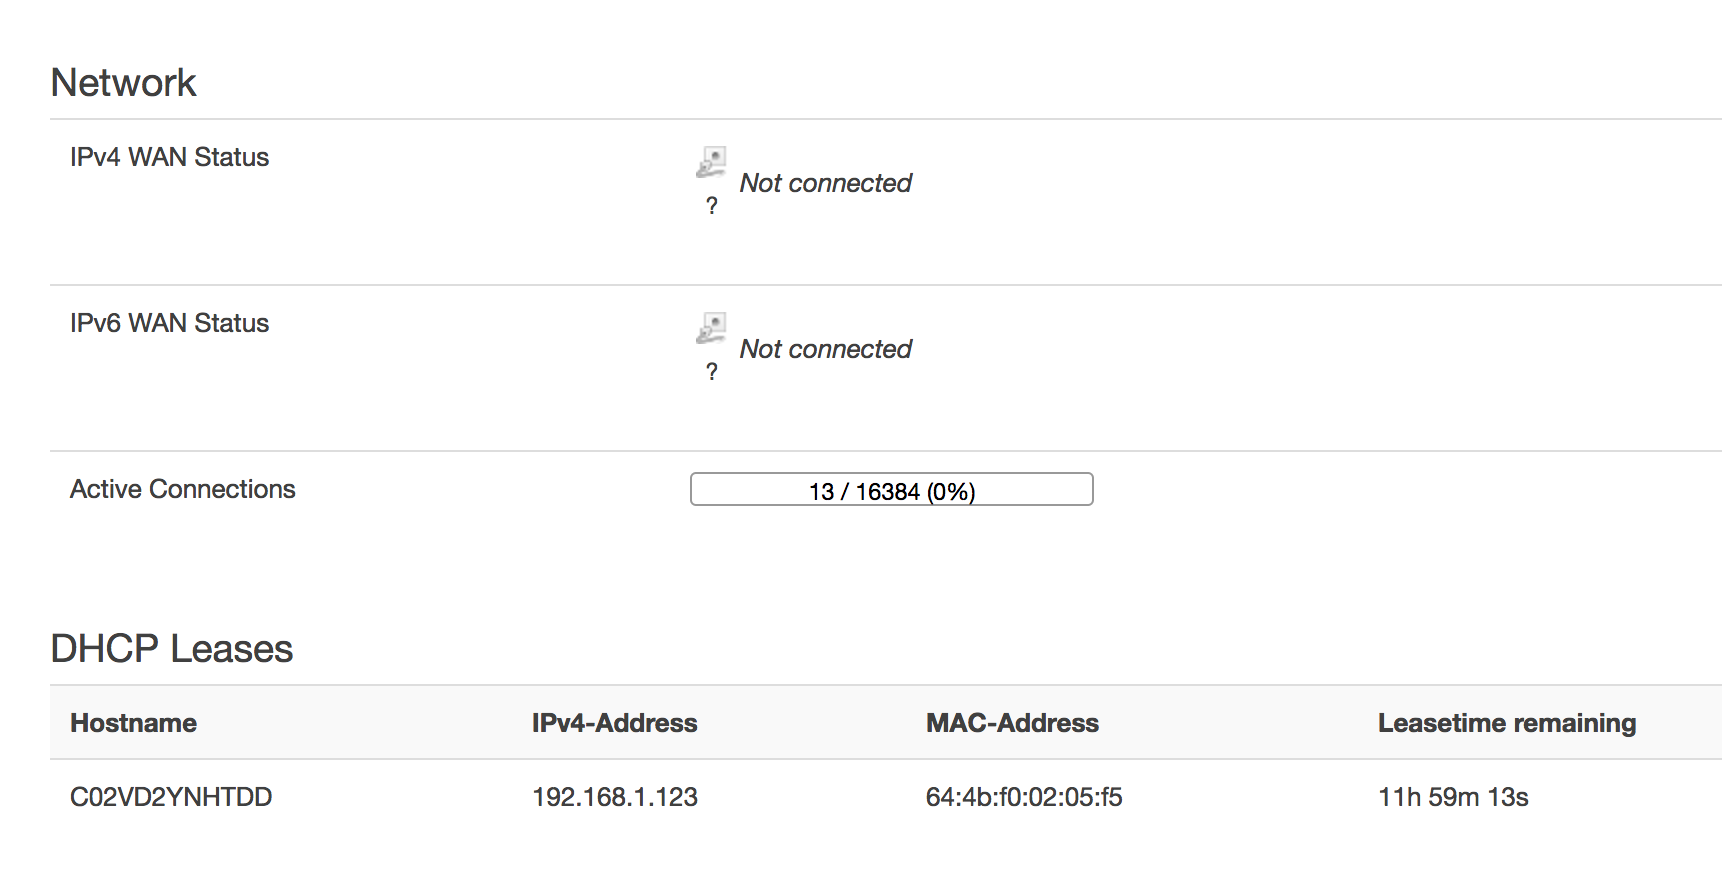
Some screen shots:

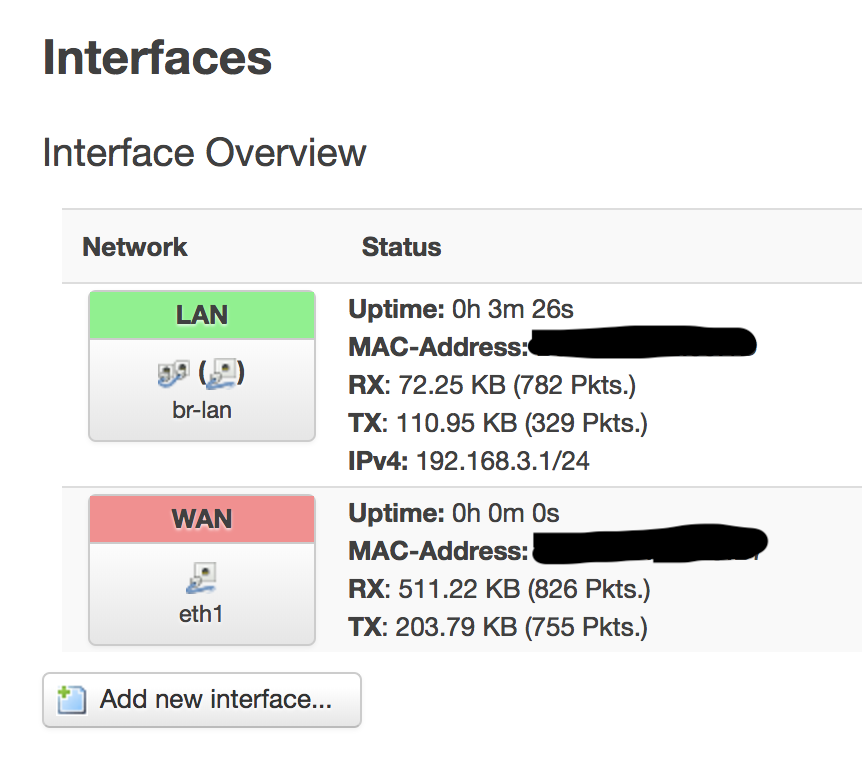
Step 3 – Install Usb-Ethernet driver And Create Interface ‘WAN’
- Unplug cable from desktop/laptop and plug it to router
- Find IP from router, and login to openwrt web UI
- Verify Pi can access internet
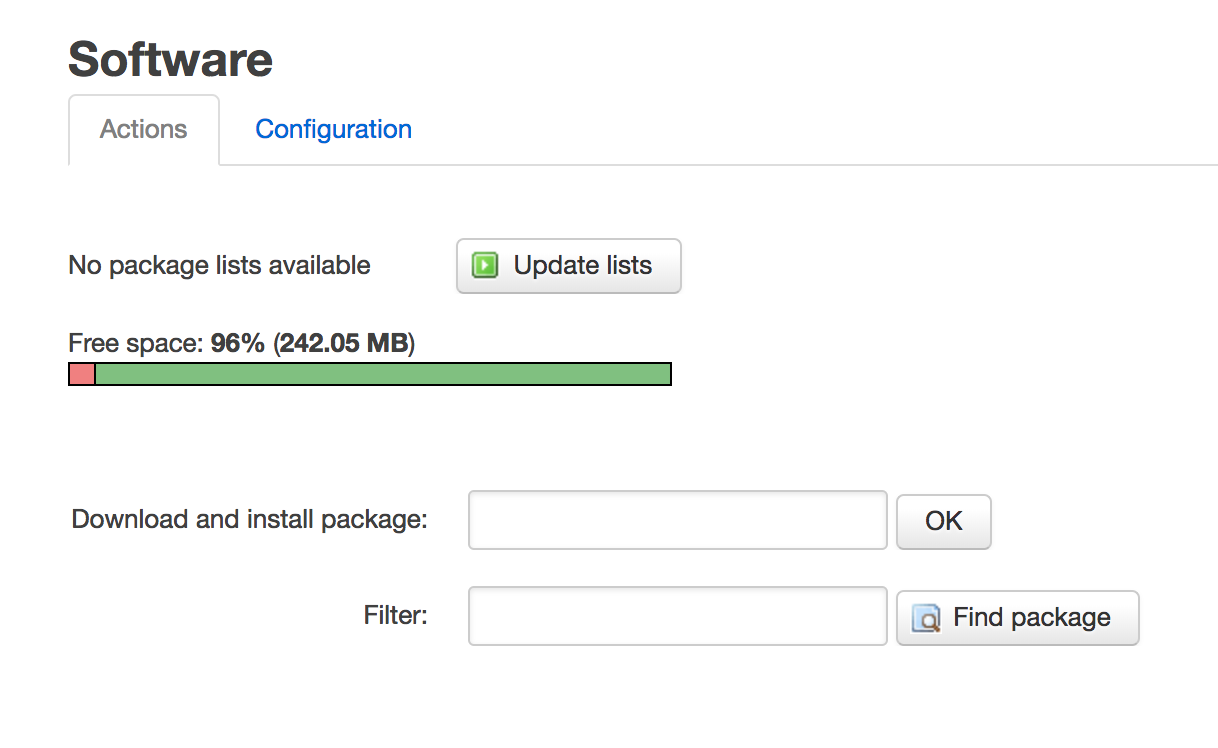
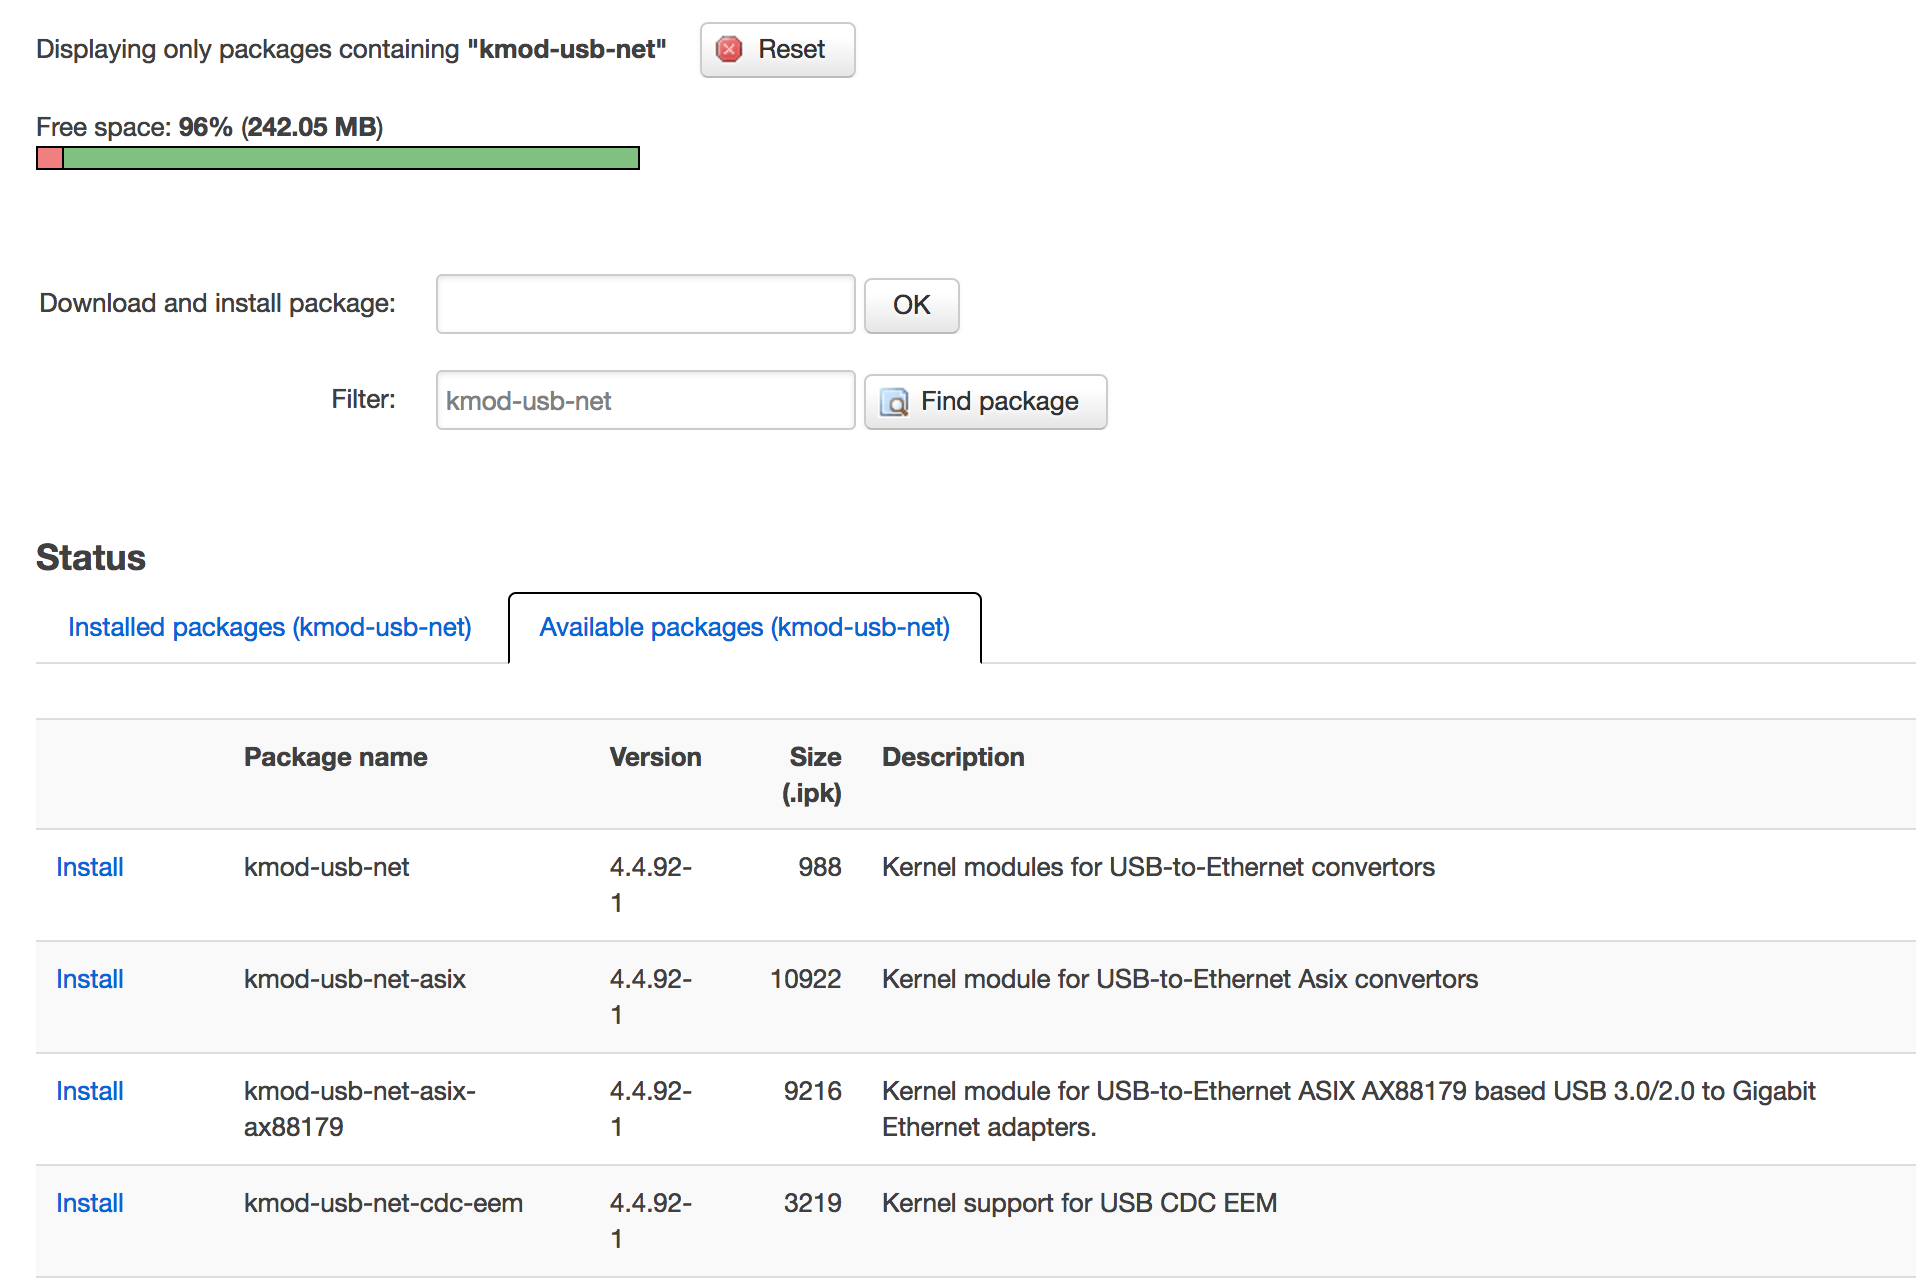
- Update opkg list
- Install Usb-Ethernet drivers
- kmod-usb-net
- kmod-usb-net-asix
- kmod-usb-net-asix-ax88179
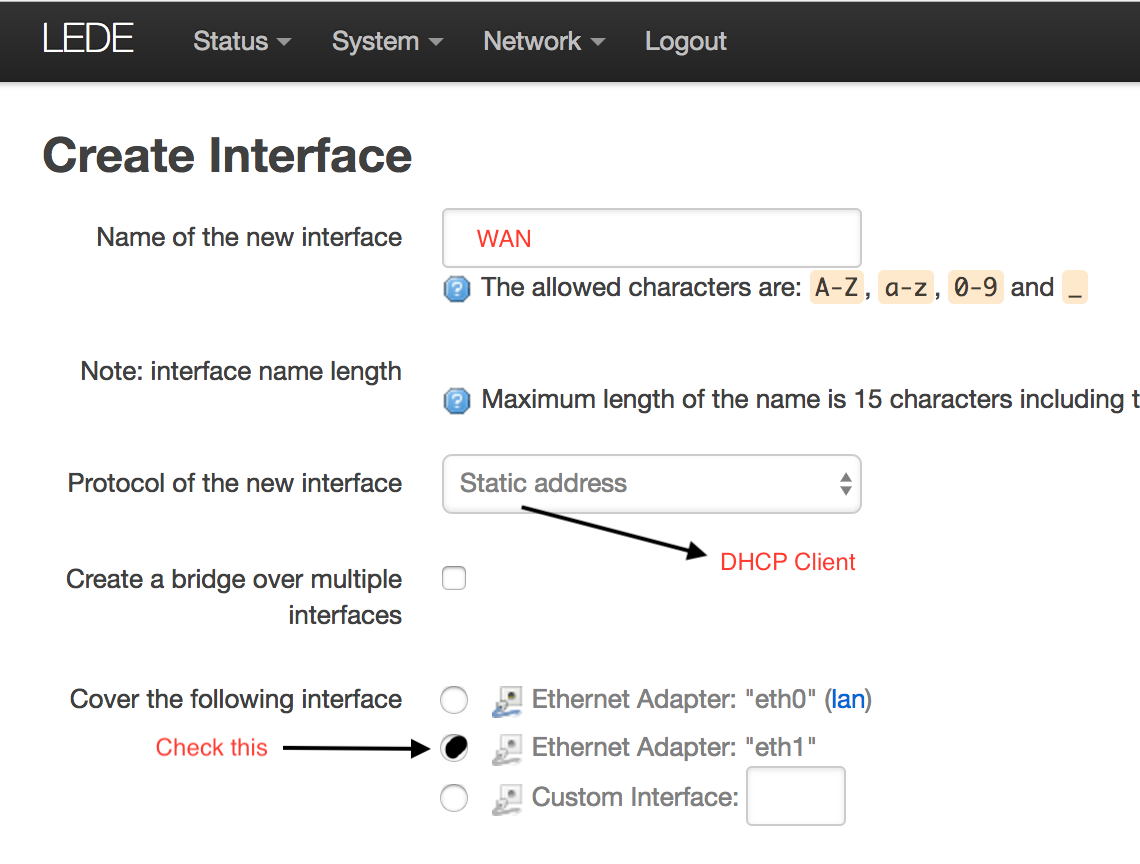
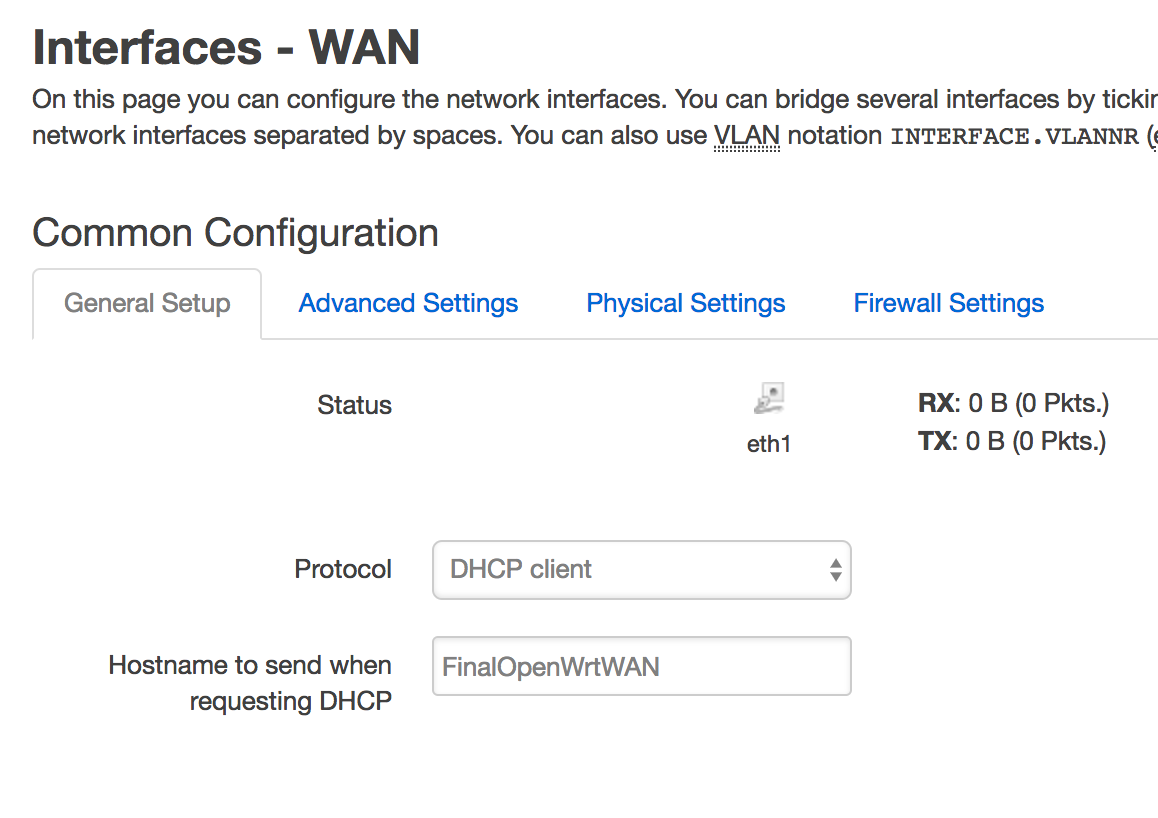
- Create a new Interface named ‘WAN’
DHCP Clientmode (My modem will assign an IP)- Select the
eth1interface (The onboard ethernet port iseth0)
- Change Firewall Rule
- Allow WAN accept traffic.
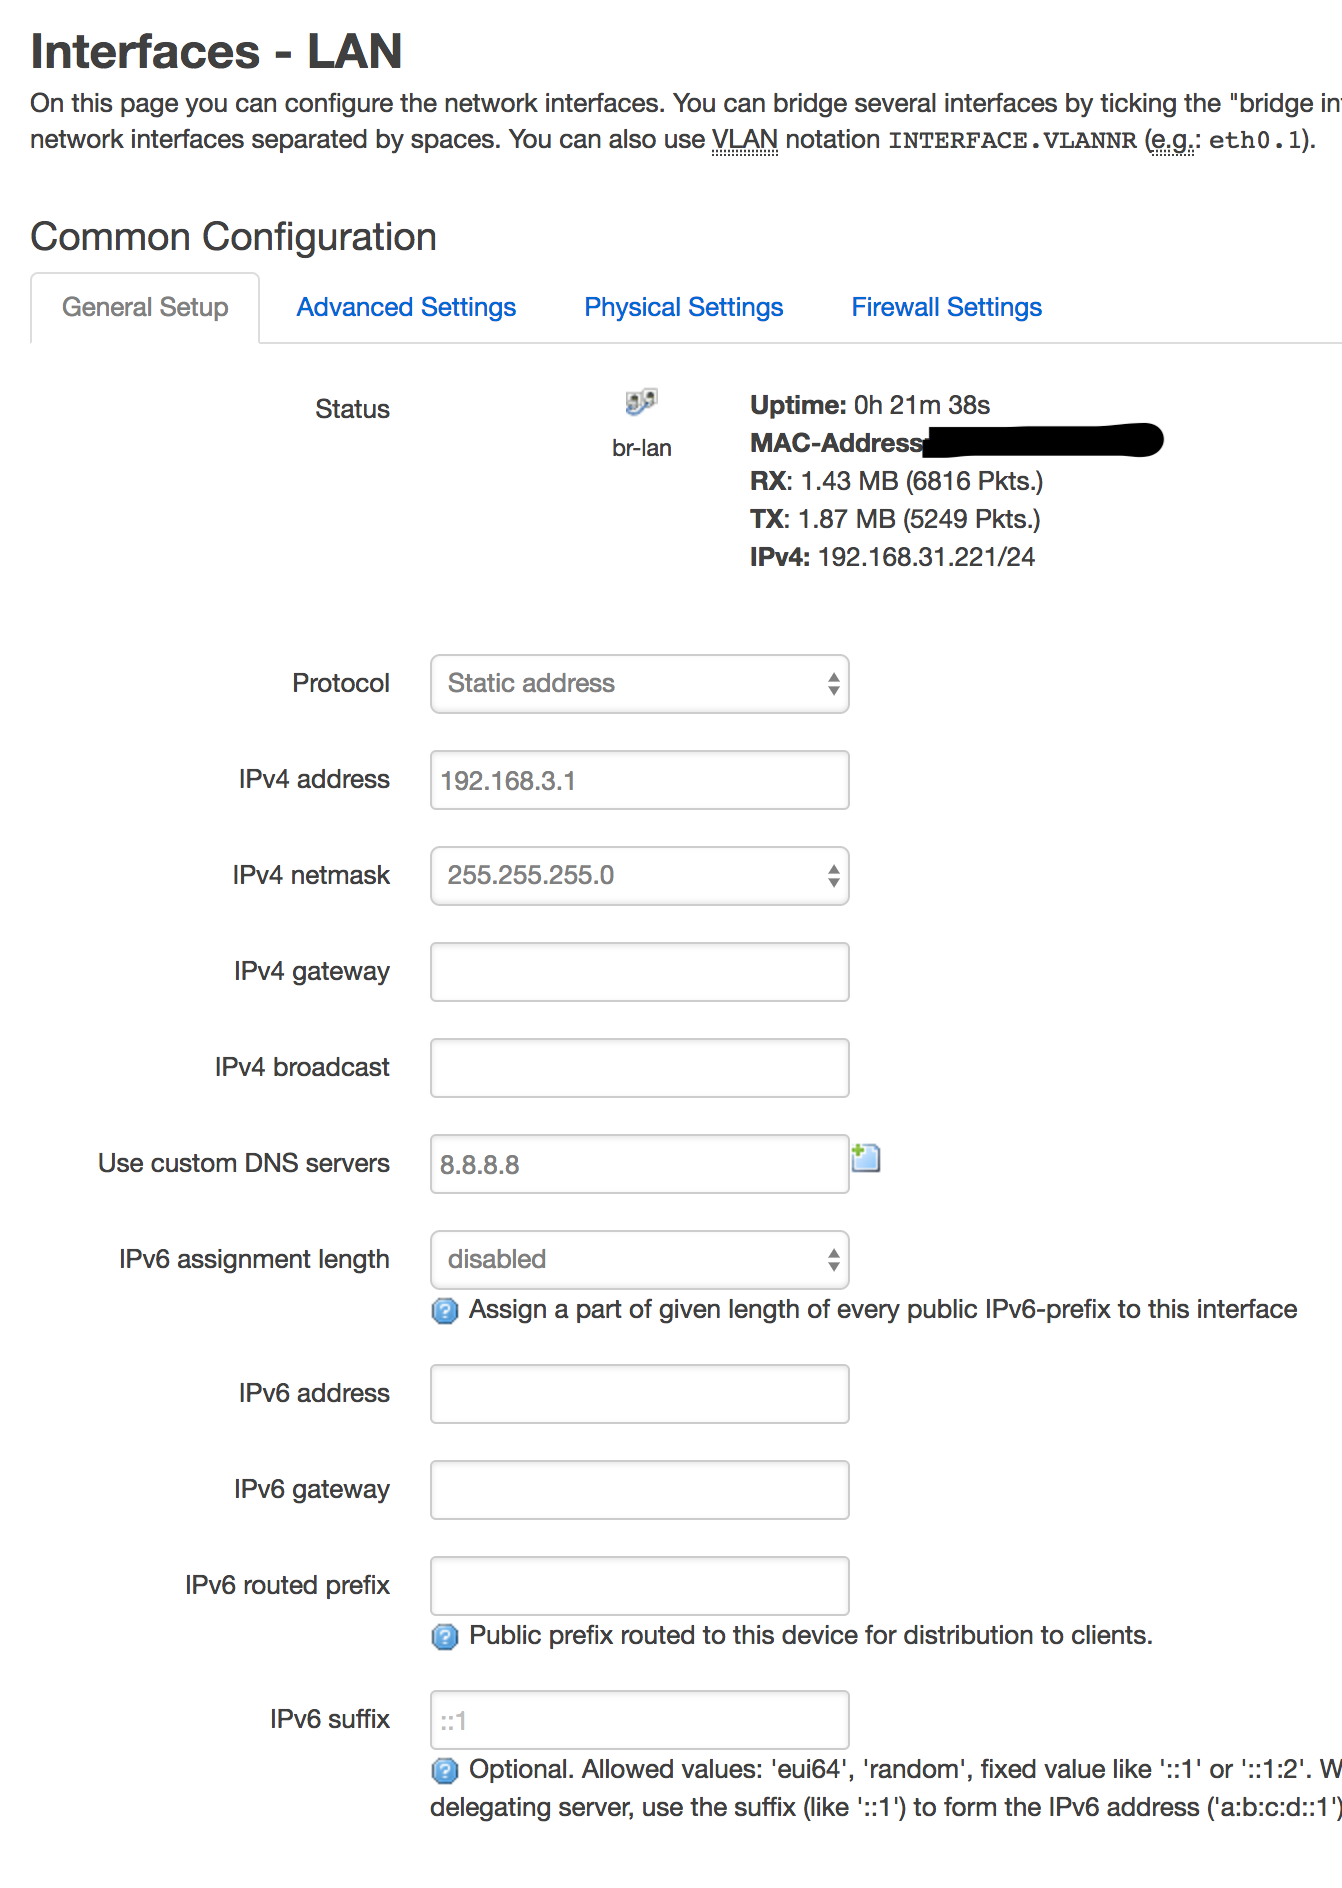
- Change Interface ‘LAN’
- Net mask: 255.255.255.0
- DNS server (optional)
- Static IP mode (
192.168.3.1)
Notes: By default, the newly created ‘WAN’ interface will reject inbound traffic, turn to accept to allow traffic.
Notes: In the case there is no Modem, change to PPPOE accordingly.
Some screen shots:


Step 4 – Pi take over internet traffic
- Reconfigure cables
- Connect modem to Pi WAN (Pi usb-ethernet adapter port)
- Connect router to Pi LAN (Pi onboard ethernet port)
- Restart Modem (This may takes 2 ~ 3 mins)
- Login back and configure
- Open browser, go to
http://192.168.3.1 - Setup Port Forwarding (optional)
- Install other packages (optional)
- Open browser, go to
Notes: Restart Modem sometimes is necessary, otherwise it may not assign the IP again for the new Pi router.
Some screen shots:
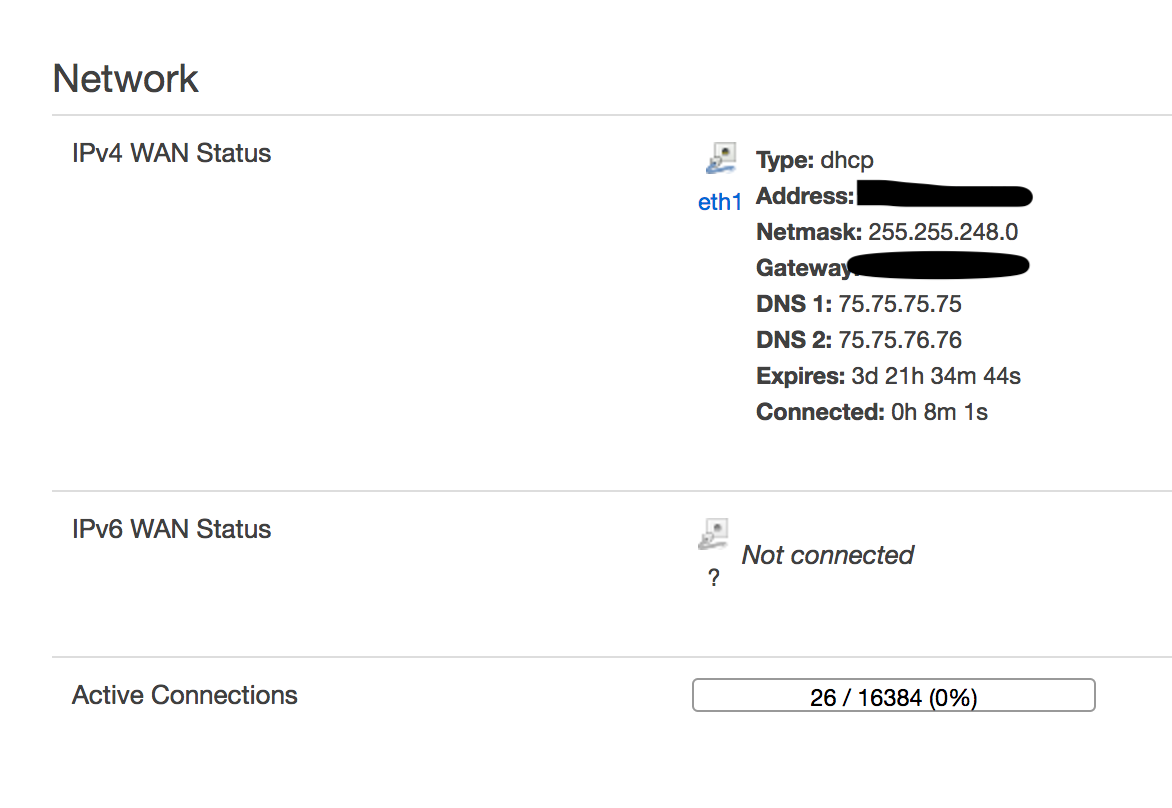
Verification
Finally, everything should be working, we can random test some websites, open the monitoring page from router UI, and just have fun :)
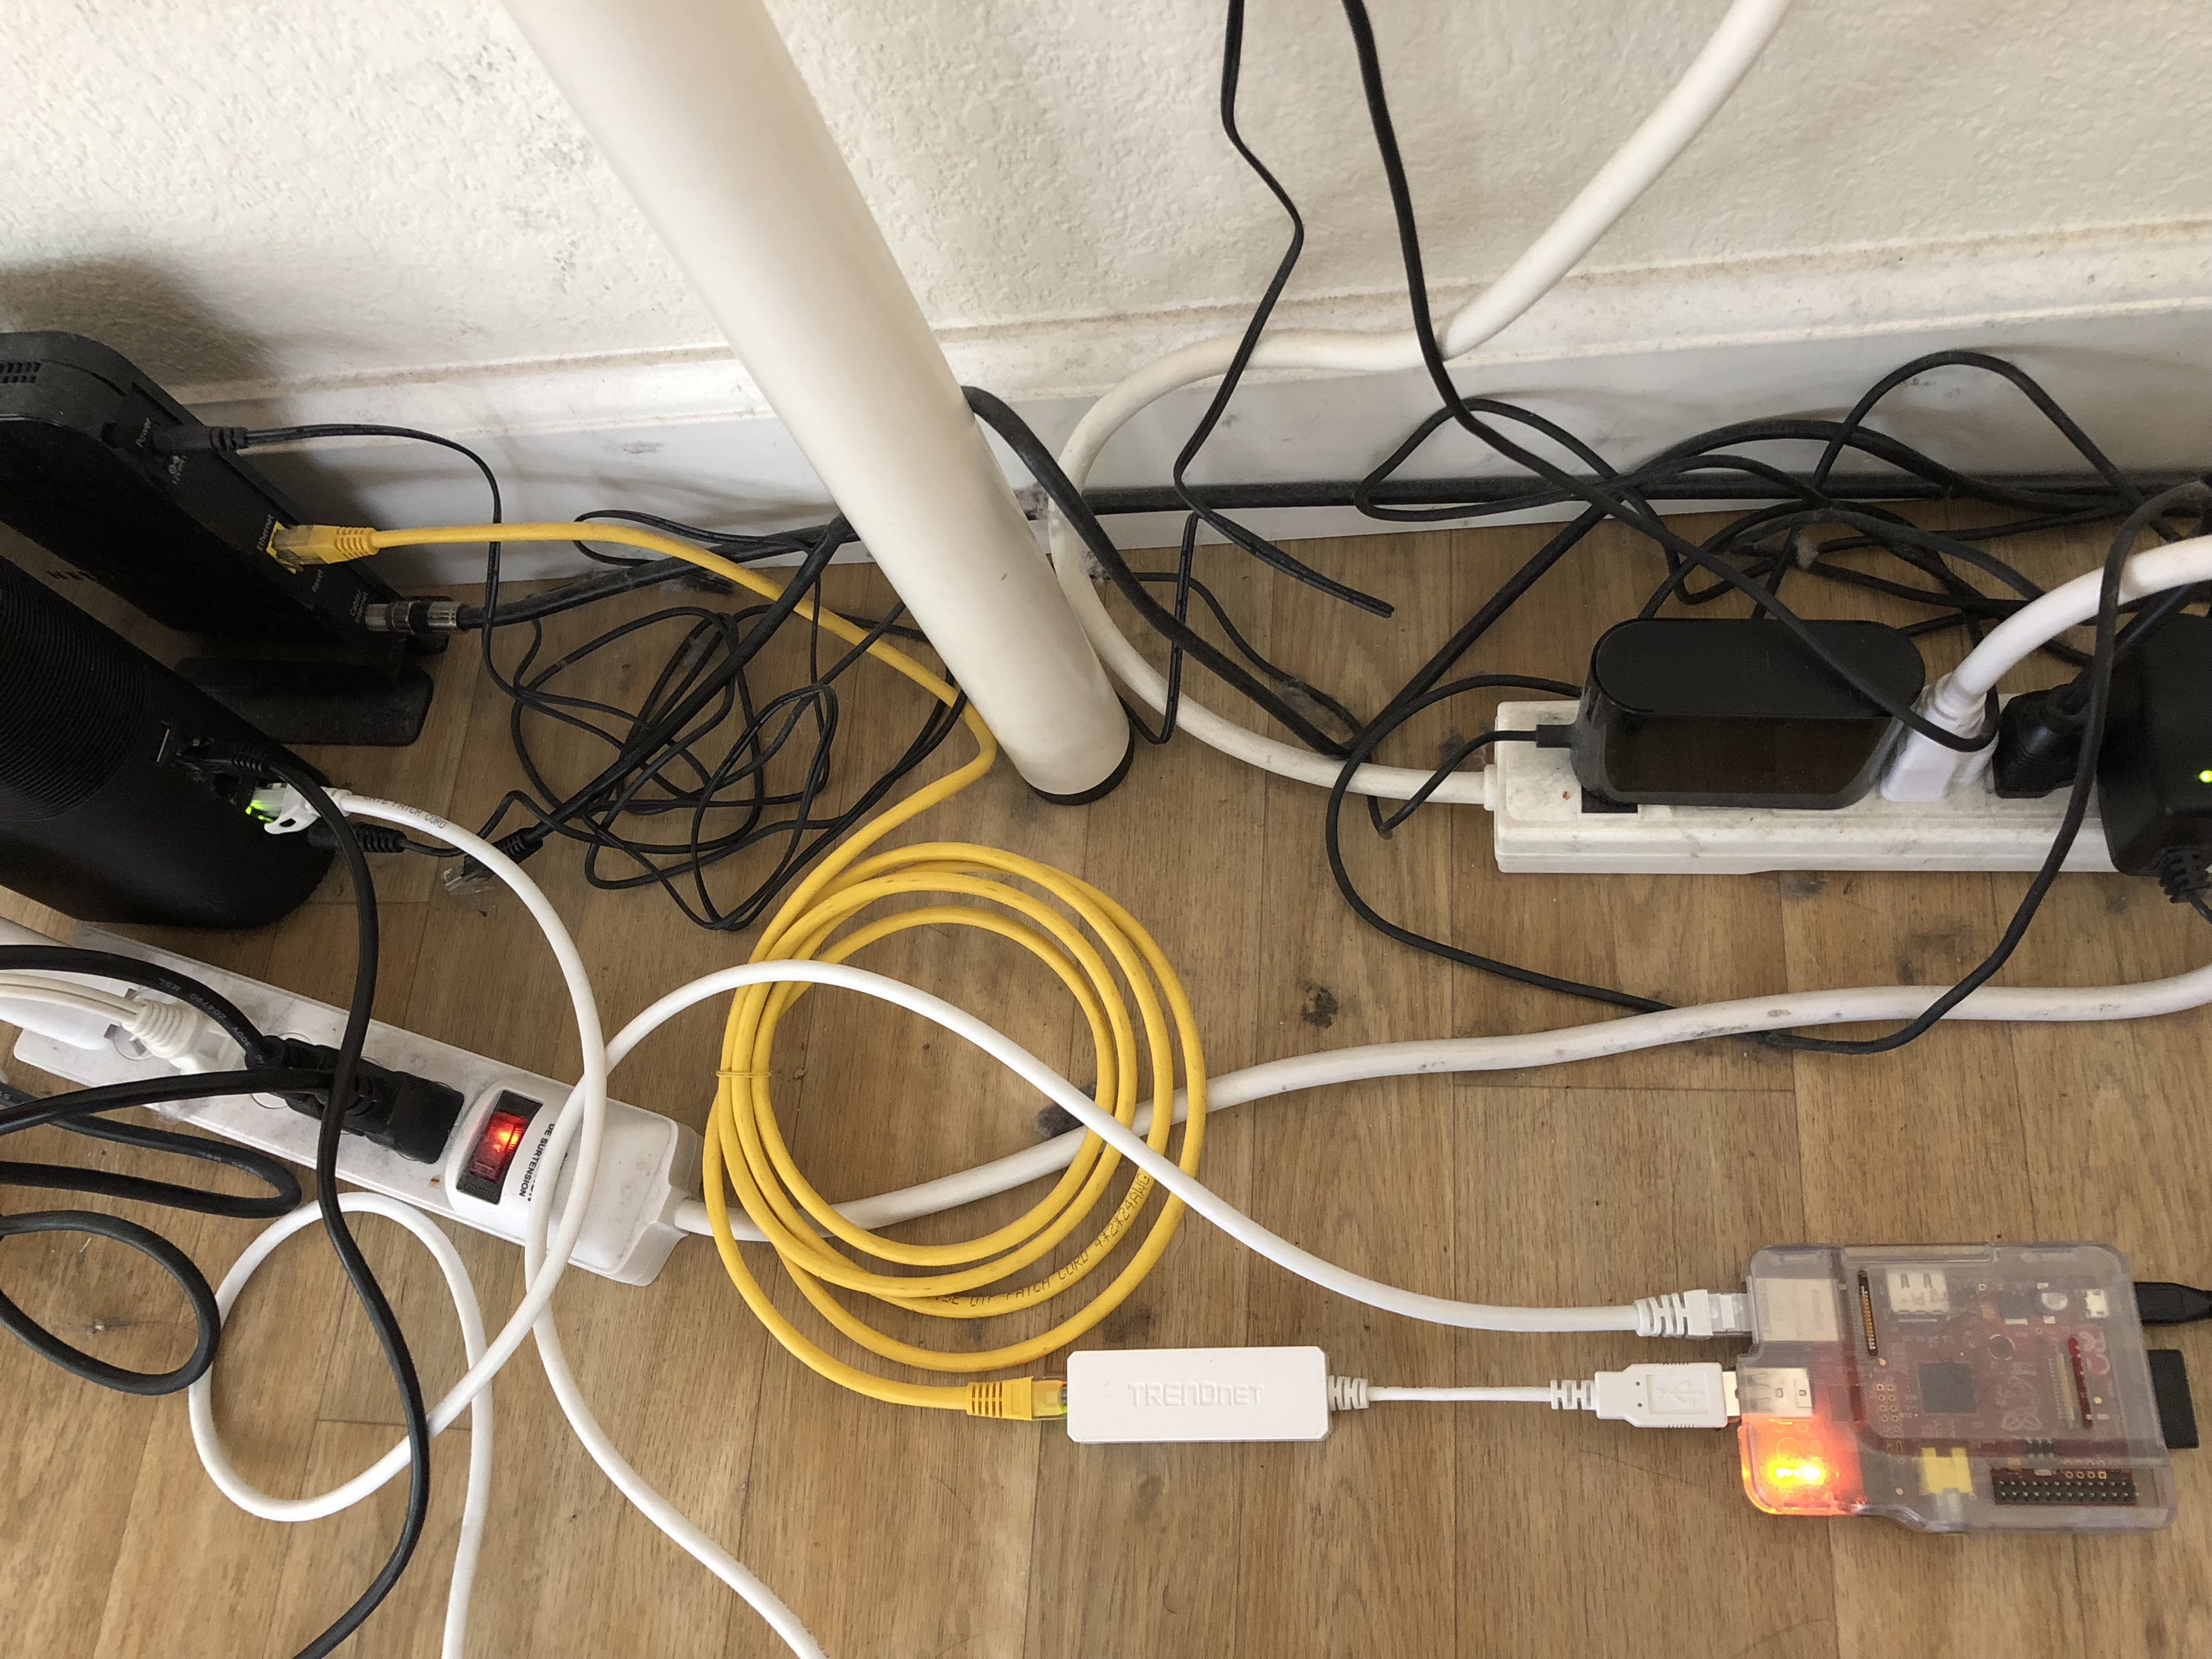
And additionally, let’s look at the final photo of Raspberry Pi right after setup. lol
Last
I put the raw mind mapping here, if we prefer to see the whole decision/operation more clearly, this would help :)
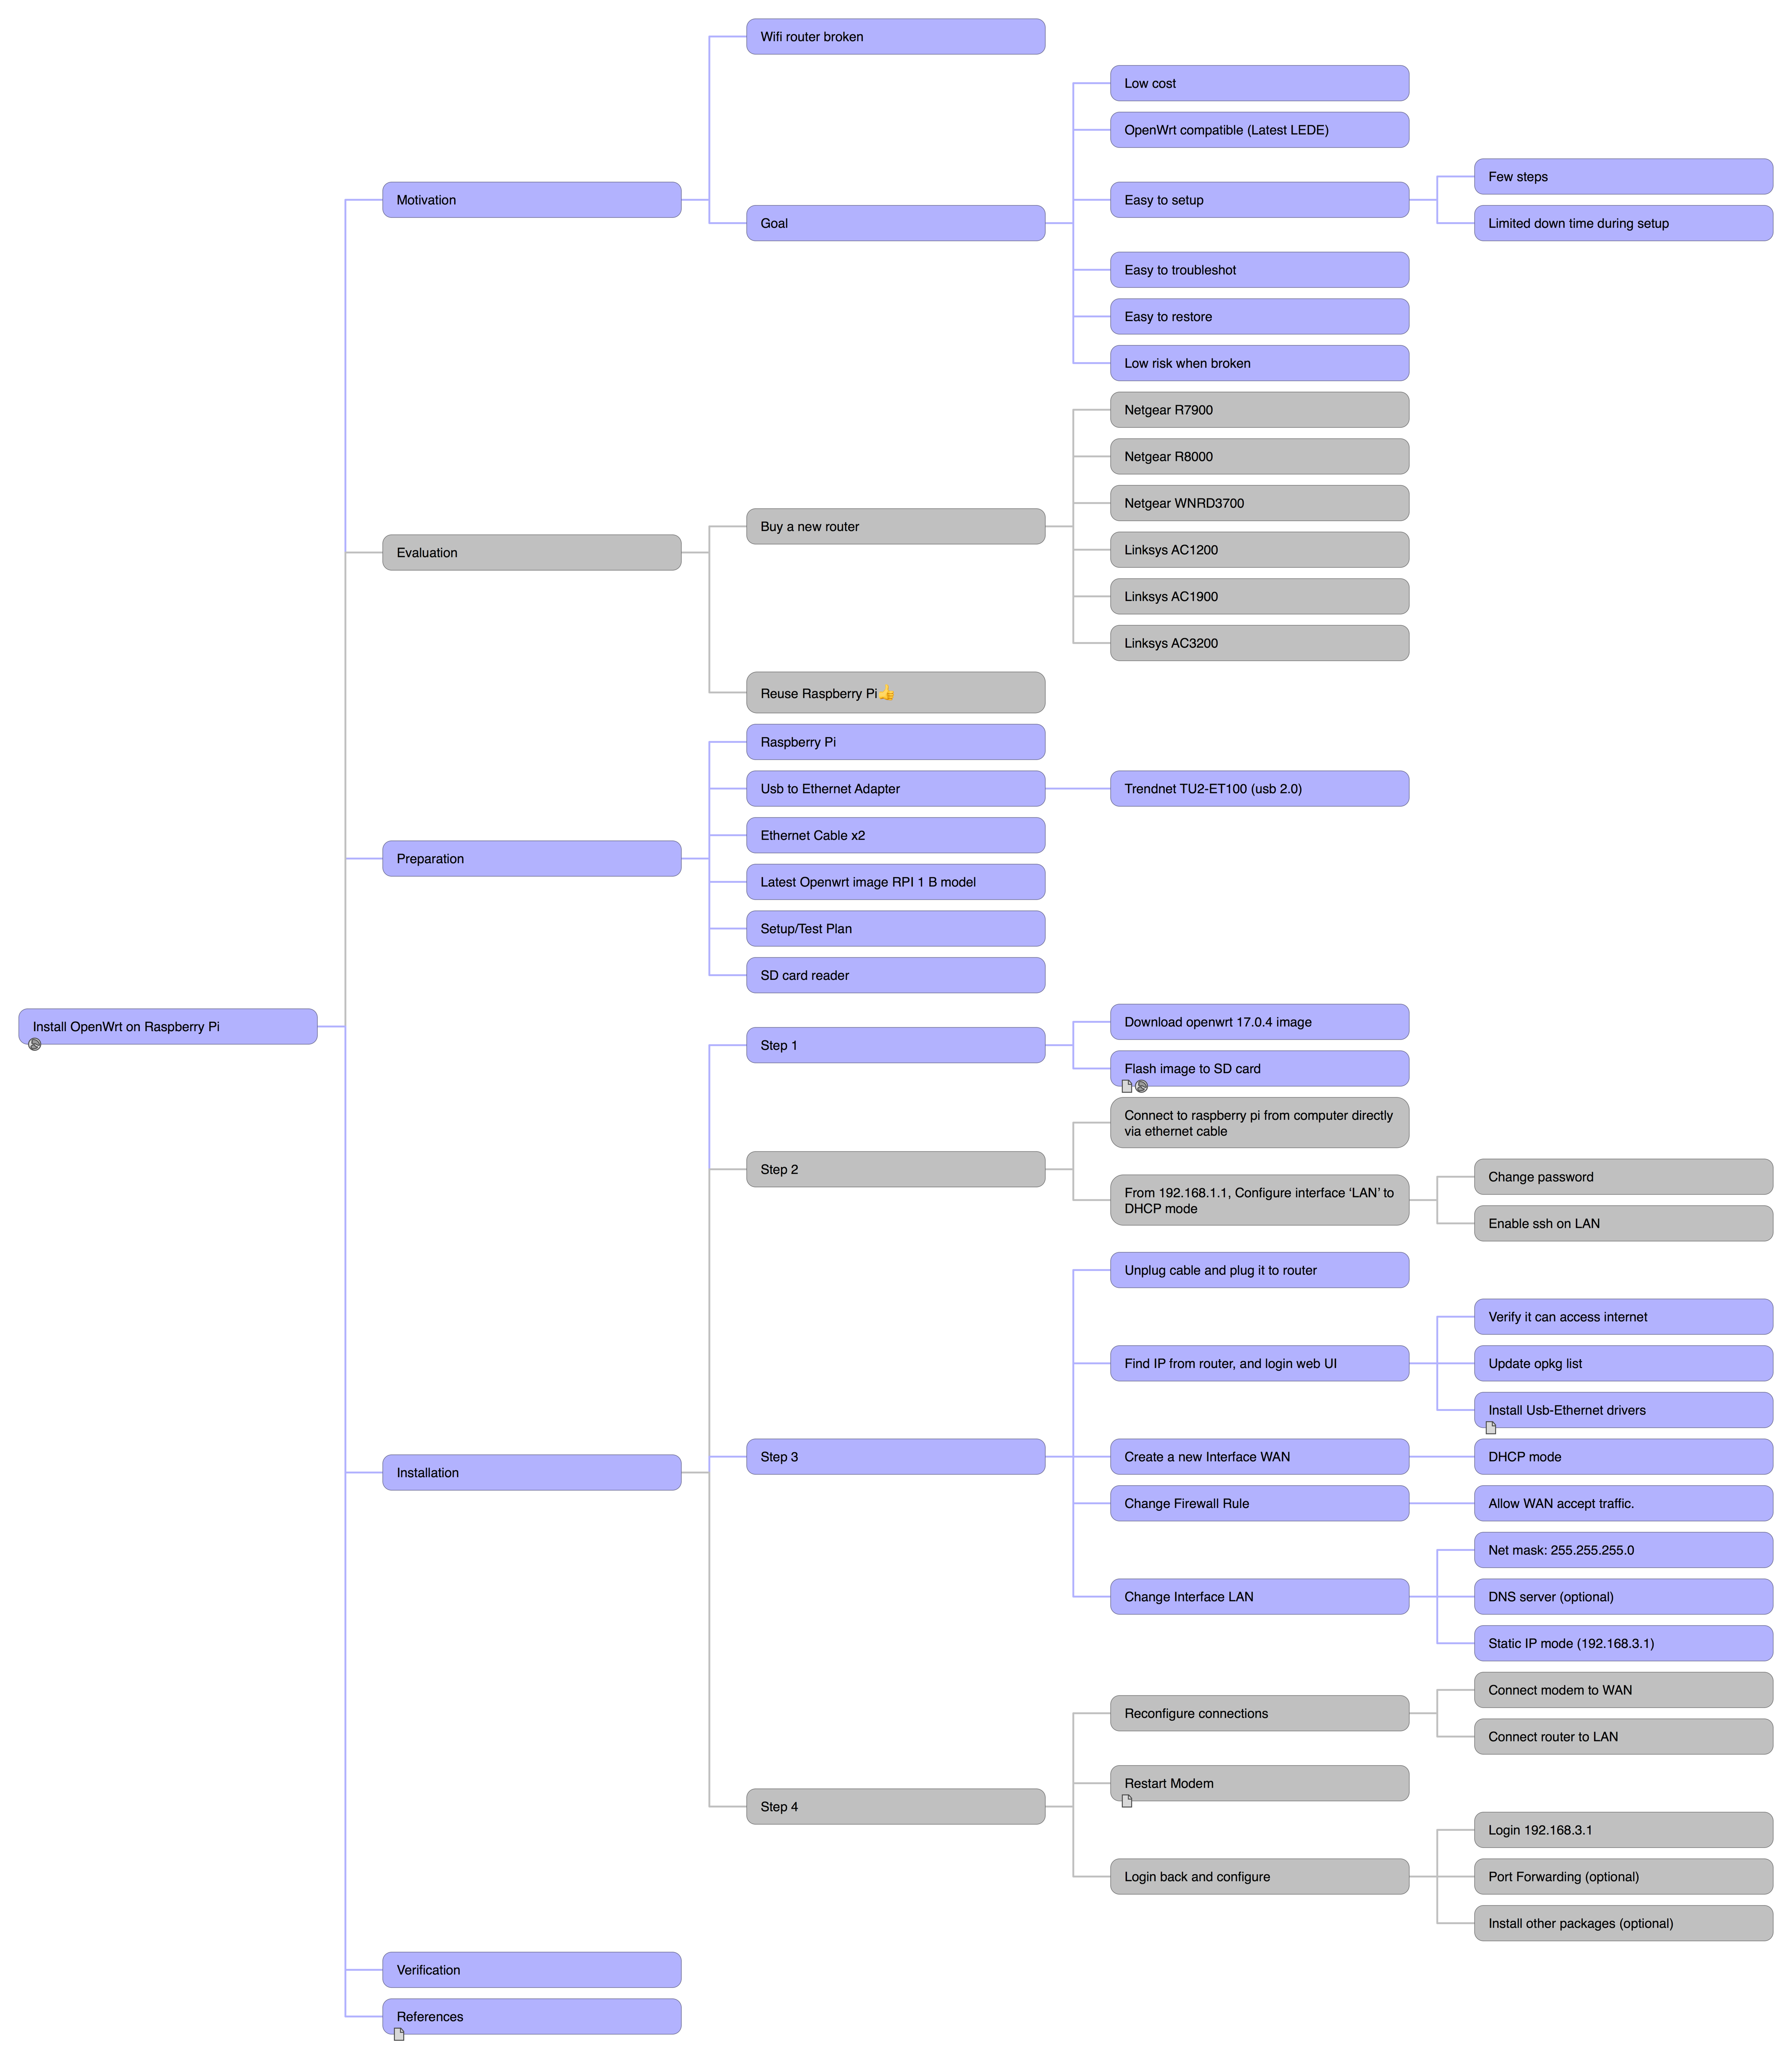